I'd always taken a much looser approach before to spinning smaller quantities, aiming for general weights and not worrying too much about the details. I'd often not have a specific project in mind when spinning a braid or two. I'd just think "Hat", "mitts", "cowl" based on how much fiber I had or the colors.
Once I decided to spin a sweater quantity of fingering-to-sport weight yarn, I also came to the decision that I would do this 'properly'. I put properly in quotes because I decided this was the correct way for me to do it for the results I want. That's one of the beauties of spinning your own yarn - you get to decide what kind of yarn and final project is right for you.
My goals are to spin a 3 ply yarn that is approximately fingering or sport weight once all is said and done. I want it to look as even as possible, i.e., as close to commercial yarn as I can get it. To me, and for this project, that is my challenge: to spin and ply consistent singles to get a uniform yarn over the approximately 2,000 yards I'll need.
I'm keeping track of my progress and details using Ravelry's handspun page feature. To get consistent results I'll need to be diligent about tracking things like ratios used, wpi (wraps per inch), and even, yes, doing test yarns and sample swatches. When I'm on my 4th or 5th bobbin of singles, I want to know I'm using the same whorl and spinning the single to the same wpi as I did for bobbins 1-4.
I was eager to get started. As with most projects, I wanted to start and finish it right! away! And see results!
But I reined myself in and committed to spinning and plying a test amount first. After all, why fill a whole bobbin (or more) full of singles without knowing if I was getting the results I needed?
So, I spun what turned out to be 31g of singles at approximately 40 wpi. (Did I mention I bought a scale that measures down to .1g so I could get really detailed measurements?) Then, I split that as evenly as I could among three weaving bobbins - that's where the really accurate scale comes into play. One of my Maryland Sheep & Wool Festival purchases had been a bobbin winder, allowing me to easily wind singles off my Lendrum bobbins and onto the smaller, plastic weaving bobbins.
With the singles evenly distributed, I switched from my fast flyer (12:1 whorl) to the regular flyer and used the smallest whorl (10:1). This was among the suggestions given by Judith McKenzie in her spinning class - to use a whorl 1 bigger for plying than you had for spinning the singles. You want your singles to have lots of twist and ply them with slightly less (removing some of the twist). I'm paraphrasing and hopefully not distorting the message too much.
I plied the 3 singles until I ran out on the first bobbin. Happily, there wasn't too much of the singles left of the other bobbins. I'll use the leftovers later.
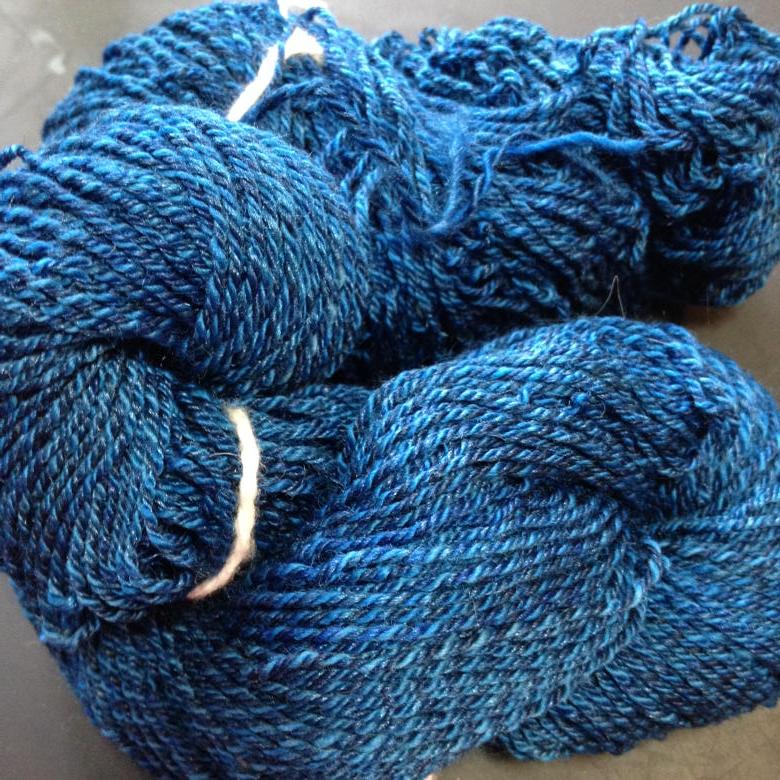
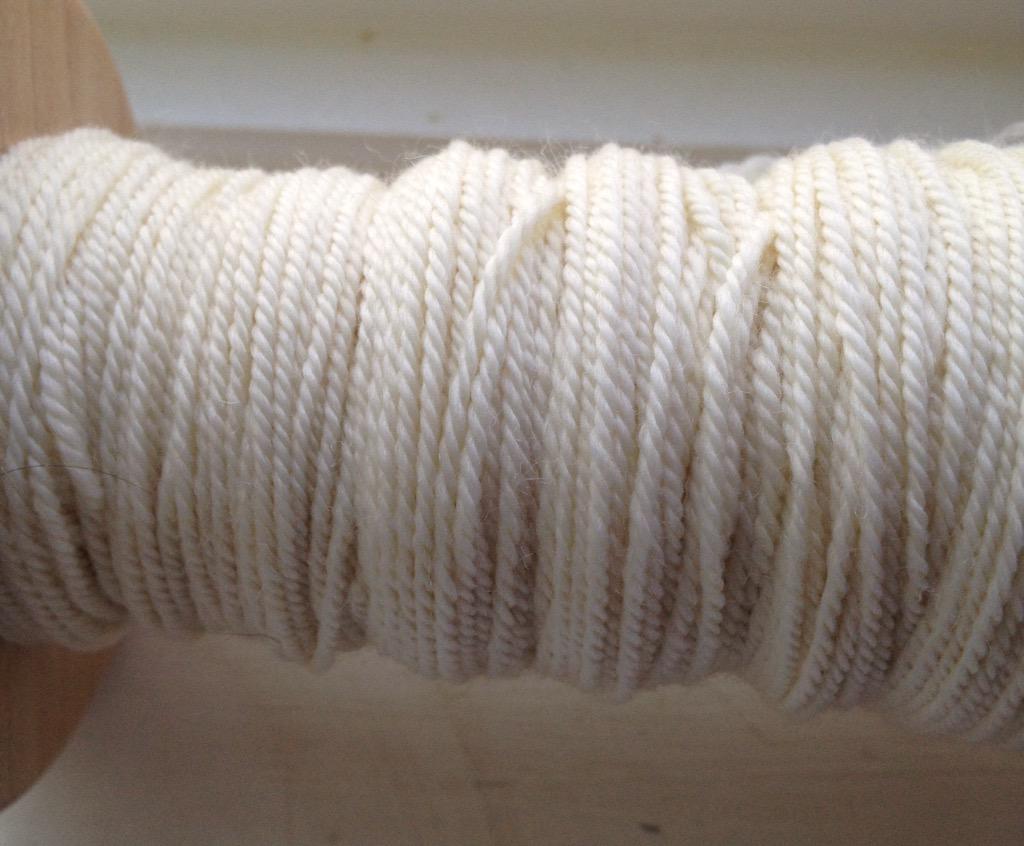
I have to admit, the 3 ply looked pretty darn fantastic on the bobbin. I let it sit for a day or two, as general wisdom recommends. Then I let it soak in cold water with some Soak and gave it a rinse. I always give my plied yarn a good whacking to even out the twist. Generally, I hold the skein and whack it (overhand) 3 times against the side of the tub, give the skein a quarter turn and whack some more, until I've given the skein a full turn. Then I hang it to dry, unweighted.
 |
| 3 ply, on the bobbin. |
I ended up with approximately 67 yards of 3 ply yarn that was approximately 18 wpi, which according to Ravelry is close to fingering weight.
What I did next was even more against nature than spinning and plying only 30g of fiber. I swatched. But that's a tale I'll tell next time.